How to Merge/Combine/Join VOB Files
If you have a series of VOB files, which may be part of the same movie, you may want to merge them together into a simple file for further use in iDVD or other applications. Here an all-in-one application Wondershare Filmora Video Editor (Filmora Video Editor for Mac) is ready to help. It enables you to merge VOB files quickly and easily. Apart from making a complete video file, you can also directly burn the new, complete file to a DVD disc if you need. So especially for those who merge VOB files together for a playable DVD, this app is absolutely the best choice.
Easy-to-use VOB Merger: Wondershare Filmora Video Editor
- Easily merge VOB videos together with no quality loss.
- Various video transition effects to let you enrich your videos.
- Easily make a Picture-in-Picture video (another way to join VOB files).
- One-click to burn a DVD collection or share on YouTube and Facebook.
- Supported OS: Windows (Windows 8 included) & Mac OS X (above 10.6).
1. Load VOB files to this VOB merger
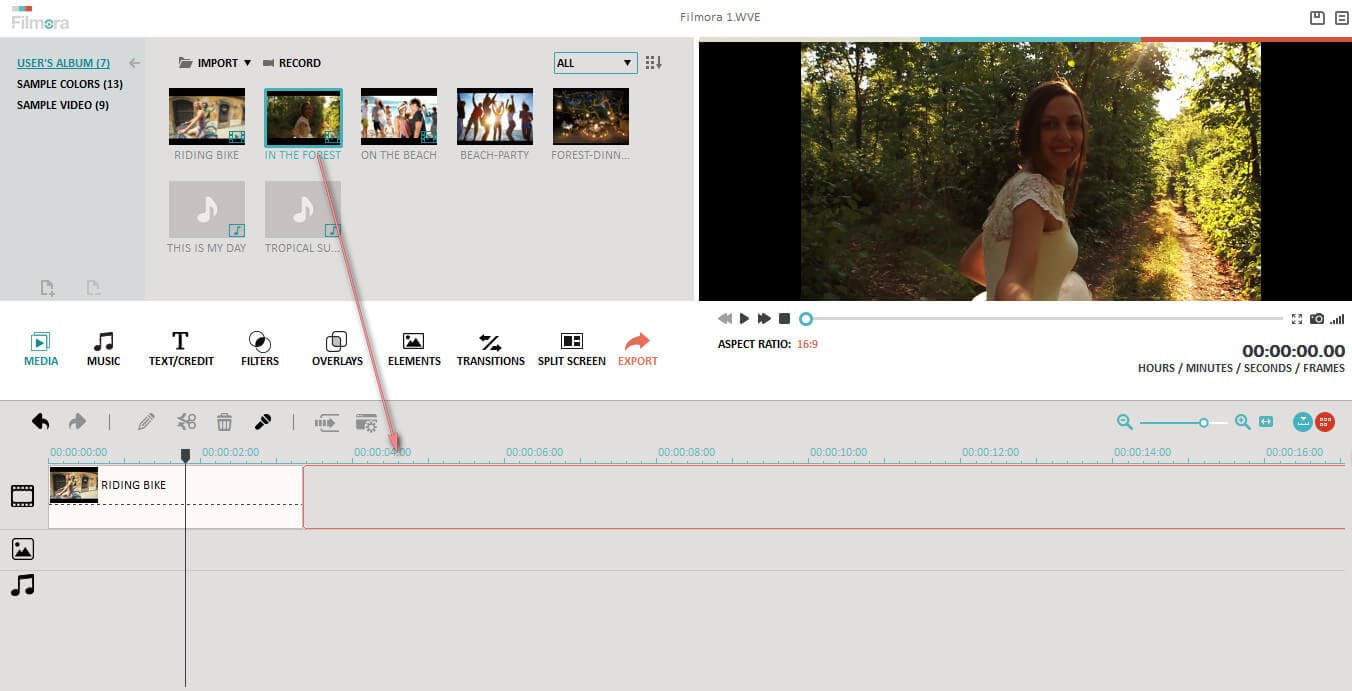
Click "Import" option to load all VOB files you want to merge from the computer to the User's album. Alternatively, directly drag and drop these target VOB files from your hard disk to the album. After that, you'll notice the added videos are displayed in the pane of this program.

2. Merge VOB files
Drag these imported VOB files from the album to the Timeline at the bottom in sequence. Make sure they are arranged in correct order and without overlapping. If necessary, you can move the slider bar to help you range VOB files better by zoom in and zoom out. If you need to delete some video clips, you can highlight it by a simple click, and then click the Scissor icon.

3. Add transitions (optional)
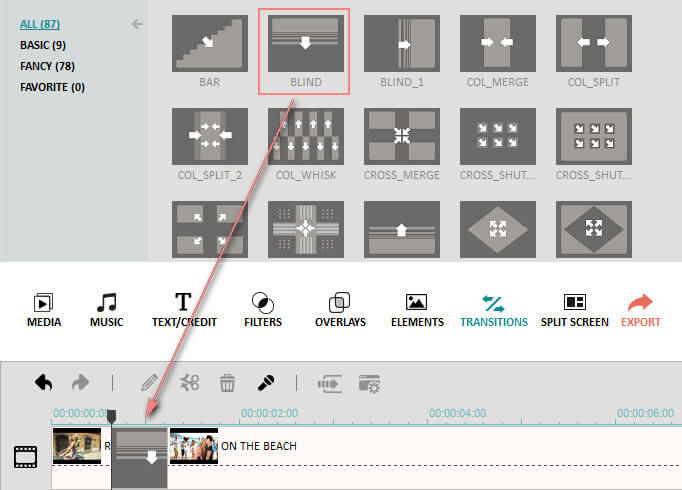
By default, there will be no transition applied to the joined VOB videos. If you want to add transition between clips, click the "Transition" tab on the toolbar, and drag your wanted effect to the target position on timeline. To add the same transition to all your clips, you can right click your desired transition and choose "Apply to All". You can also choose "Random to All" to add transitions automatically in seconds.

4. Export a complete VOB video or burn to DVD
Press the "Create" button to open the output window. At this time, you can choose to continue to save the new video in VOB format or burn the video creation to DVD. To export a new, big VOB file, you just select "Format". If you want to burn to DVD, click "DVD" tab, insert a blank DVD disk, and then let this app's wizard to walk you through the last process.


